


Series: Kubernetes Services Deployment, Autoscaling and Monitoring, part 2
At NearForm we are always learning and investigating new ways to work with the open source projects we use in our client projects. The nature of Open Source projects means that they are always being upgraded and improved upon with new features and platforms popping up on a consistent basis. For this reason it is crucial for our developers to stay abreast of the latest trends, technologies and best practices.
Our DevOps community recently did some research on Kubernetes services deployment, autoscaling and monitoring and we are sharing the results of their investigation here.
- Deploying and Autoscaling Kubernetes with Knative
- Autoscaling Kubernetes Services with Keda
- Monitoring and Tracing Kubernetes Services with Otel
Kubernetes Overview
Kubernetes (K8s) is an open source platform for automating deployment, scaling, and management of containerized applications. It groups containers that make up an application into logical units for easy management and discovery. Kubernetes builds upon 15 years of experience running production workloads at Google, combined with best-of-breed ideas and practices from the community.
Kubernetes provides a powerful API that enables third-party tools to provision, secure, connect and manage workloads on any cloud or infrastructure platform. It also includes features that help you automate control plane operations such as rollout cadence, versioning and rollback.
Kubernetes is ideal for organizations that want to run containerized applications at scale.
Many organizations now run entire business functions in containers instead of traditional applications. This shift requires changes in how IT operates – from managing virtual machines to managing container orchestrators like Kubernetes. Business leaders are demanding more agility from their IT departments to support fast-moving projects with new technologies like microservices architecture, serverless computing and cloud native computing platforms like OpenShift Container Platform or Azure Kubernetes Service (AKS).
Background
In our first post in the series we introduced and explored the benefits of Knative. One of the features offered by Knative is the ability to manage the service/function autoscaling with ease.
Knative follows a serverless approach and autoscaling is one of the pillars that make serverless an interesting deployment pattern. Knative also offers an eventing paradigm.
We want to introduce a different technology that is completely focused on event based autoscaling and that offers a wide range of triggers ready to go. Let’s talk about KEDA.
What is KEDA?
KEDA stands for Kubernetes-based Event Driven Autoscaler. It allows users to configure their clusters to scale applications’ replicas based on events. It works by using components called Scalers, which are essentially triggers that answer to events.
KEDA is a lightweight deployment that can be run in any Kubernetes cluster. It works alongside components like Horizontal Pod Autoscalers with no problem and, in such cases, can even extend functionality. KEDA can be configured to scale a small subset of applications or even all of them.
What are KEDA Scalers?
Scalers are event sources that KEDA uses as the base information to scale applications. There were, by the time this article was written, more than 50 scalers available in their catalog. Cron (scales applications based on a cron schedule), PostgreSQL (which scales apps based on PostgreSQL query results) and Prometheus (which scales applications based on Prometheus Metrics) are some examples of what is supported out of the box.
Since KEDA is a CNCF (Cloud Native Computing Foundation) incubation project, and they have an active community, it is common to find samples of what can be done with it on the internet. Browse through the list of repositories with examples on some of the available scalers.
What should we use KEDA for / with?
Since KEDA’s main focus is on scaling applications’ replicas, its main use should be to handle automatic scaling of Deployments / StatefulSets based on events.
A pretty common use case is to use Keda to scale workers that spool jobs from a queue or from a message broker. KEDA can be instructed to scale the number of workers up and down leveraging the queue length as the key metric.
That said, KEDA can also be used in conjunction with other tools to help the users achieve more control over their Kubernetes clusters.
A good example of integration is Knative. Knative, as we discussed in the first post in this series, is a solution to build serverless, event-driven applications. While it provides autoscaling features, it lacks the easy support for external triggers that KEDA does provide. Relying on Knative for service deployment and leaving the autoscaling duties to Keda will give the best of both worlds.
What are we going to do with KEDA?
In this article, I will walk you through deploying, configuring and actually seeing KEDA work. For that, you will need a Kubernetes cluster v1.16+ running. To make this process convenient, we will be using Helm to install and configure KEDA. You can find information on Helm at the Helm website.
So without further ado let’s dive in.
Installing KEDA
First, we add the kedacore repository to our Helm instance:
helm repo add kedacore https://kedacore.github.io/charts
Then, we fetch information on the new repo we just added:
helm repo update
Finally, we create a namespace for KEDA and install its Helm chart:
kubectl create namespace keda
helm install keda kedacore/keda --namespace keda
A quick intro to some of the core KEDA concepts
The most common objects to scale with KEDA are Deployments and StatefulSets. KEDA will monitor that workload and will automatically scale the resource in/out based on the events that occur.
Behind the scenes, KEDA monitors the event source and feeds data to Kubernetes and the HPA (Horizontal Pod Autoscaler) in order to scale the resource.
KEDA can also work with Custom Resources (like ArgoRollout resources) and it works the same way as with Deployments and StatefulSets. The only constraint is that the target Resource must define a /scale subresource. More on that in the Kubernetes docs.
Choosing and configuring a KEDA Scaler
For this article, we will use the gcp-pubsub Scaler. It is based on GCP PubSub queues. It will be a fairly simple one to start with and can be very useful in the process of actually learning how to use KEDA and its scalers.
But first, let’s take a look at a ScaledObject CRD example. The ScaledObject Custom Resource is used to define how KEDA should scale the application and what the triggers are.
apiVersion: keda.sh/v1alpha1
kind: ScaledObject
metadata:
  name: queue-service
spec:
  scaleTargetRef:
    apiVersion:    apps/v1                           # Optional. Default: apps/v1
    kind:          Deployment                        # Optional. Default: Deployment
    name:          queue-service                     # Mandatory. Must be in the same namespace as the ScaledObject
    envSourceContainerName: queue-container          # Optional. Default: .spec.template.spec.containers[0]
  pollingInterval:  30                               # Optional. Default: 30 seconds
  cooldownPeriod:   300                              # Optional. Default: 300 seconds
  idleReplicaCount: 0                                # Optional. Default: ignored, must be less than minReplicaCount
  minReplicaCount:  1                                # Optional. Default: 0
  maxReplicaCount:  100                              # Optional. Default: 100
  fallback:                                          # Optional. Section to specify fallback options
    failureThreshold: 3                              # Mandatory if fallback section is included
    replicas: 6                                      # Mandatory if fallback section is included
  advanced:                                          # Optional. Section to specify advanced options
    restoreToOriginalReplicaCount: false             # Optional. Default: false
    horizontalPodAutoscalerConfig:                   # Optional. Section to specify HPA related options
      name: keda-hpa-queue-service                   # Optional. Default: keda-hpa-{scaled-object-name}
      behavior:                                      # Optional. Use to modify HPA's scaling behavior
        scaleDown:
          stabilizationWindowSeconds: 300
          policies:
          - type: Percent
            value: 100
            periodSeconds: 15
  triggers:
  - type: gcp-pubsub
      authenticationRef:
        name: keda-trigger-auth
      metadata:
        subscriptionName: "keda-app-sub"
        mode: "SubscriptionSize"
        value: "10"
        desiredReplicas: "5"
As you can see, it’s all pretty straightforward. The most important thing is the triggers definition, which will configure what kind of event our application will be scaled in response to. For this example, we are going to use a gcp-pubsub trigger.
See the docs on the KEDA website.
Deploying a sample application to the cluster
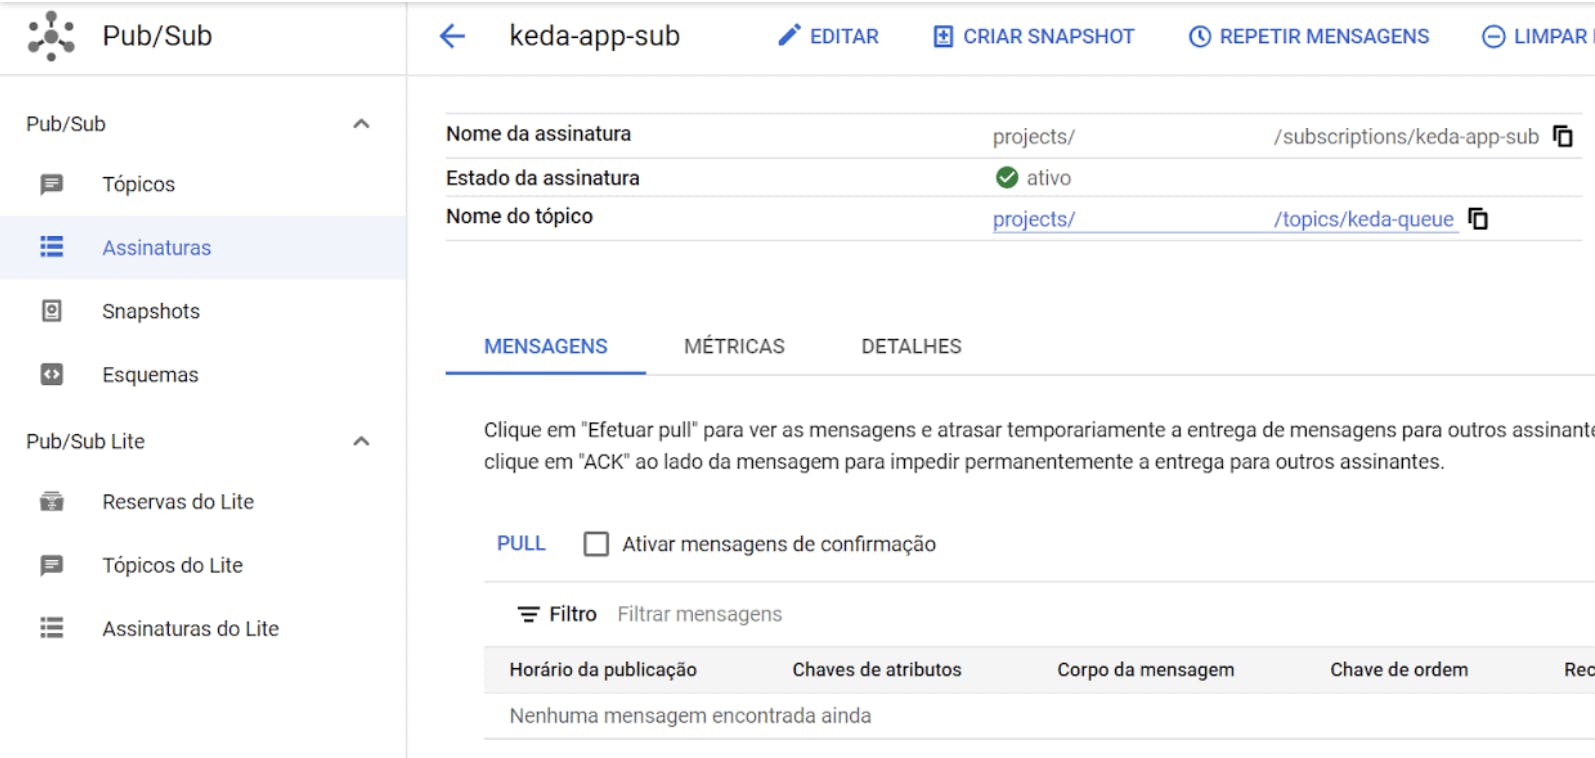
Let’s deploy a sample application to our cluster so we can see KEDA in action. First, you will need to create a topic in GCP Pub/Sub, which we will monitor in order to scale our application. Then we’ll create a subscription which KEDA will use to actually monitor the topic. Save the names of both the topic and subscription. We will use them later.
Second, you’ll need to generate a Service Account key in the GCP console. You can find the docs on the Google Cloud website.
Then, create a secret with the contents of that key so KEDA can use it to talk to the GCP PubSub service.
kubectl create secret generic pubsub-secret –from-file <key file name>
Next, we will deploy a sample application to the cluster. In this case, it will be the default NGINX Docker image. We’ll name it “keda-app”.
apiVersion: apps/v1
kind: Deployment
metadata:
  labels:
    app: keda-app
  name: keda-app
  namespace: keda-app
spec:
  selector:
    matchLabels:
      app: keda-app
  template:
    metadata:
      labels:
        app: keda-app
    spec:
      containers:
      - image: nginx:latest
        name: nginx
We will also create a Service resource:
apiVersion: keda.sh/v1alpha1
kind: TriggerAuthentication
metadata:
  name: keda-trigger-auth
  namespace: keda-app
spec:
  secretTargetRef:
  - parameter: GoogleApplicationCredentials
    name: pubsub-secret
    key: GOOGLE_APPLICATION_CREDENTIALS_JSON
---
apiVersion: keda.sh/v1alpha1
kind: ScaledObject
metadata:
  name: keda-sample-app
  namespace: keda-app
spec:
  scaleTargetRef:
    apiVersion:    apps/v1
    kind:          Deployment
    name:          keda-app
  pollingInterval:  30
  cooldownPeriod:   300
  idleReplicaCount: 0
  minReplicaCount:  2
  maxReplicaCount:  10
  advanced:
    restoreToOriginalReplicaCount: false
    horizontalPodAutoscalerConfig:
      name: keda-app-hpa
      behavior:
        scaleDown:
          stabilizationWindowSeconds: 10
          policies:
          - type: Percent
            value: 100
            periodSeconds: 15
  triggers:
    - type: gcp-pubsub
      authenticationRef:
        name: keda-trigger-auth
      metadata:
        subscriptionName: "keda-app-sub"
        mode: "SubscriptionSize"
        value: "10"
        desiredReplicas: "5"
All of those resources are located in the keda_example.yml file. To deploy them, run:
kubectl apply -f keda_example.yml
pedro_silva@cloudshell:                         $ kubectl apply -f keda_example.yml

deployment.apps/keda-app configured
service/keda-app-svc created
triggerauthentication.keda.sh/keda-trigger-auth created
scaledobject.keda.sh/keda-sample-app created
You should be able to see our app deployed.
pedro_silva@cloudshell:                         $ kubectl get deployment --namespace keda-app
NAME      READY   UP-TO-DATE    AVAILABLE   AGE
keda-app  2/2     2             2           18d
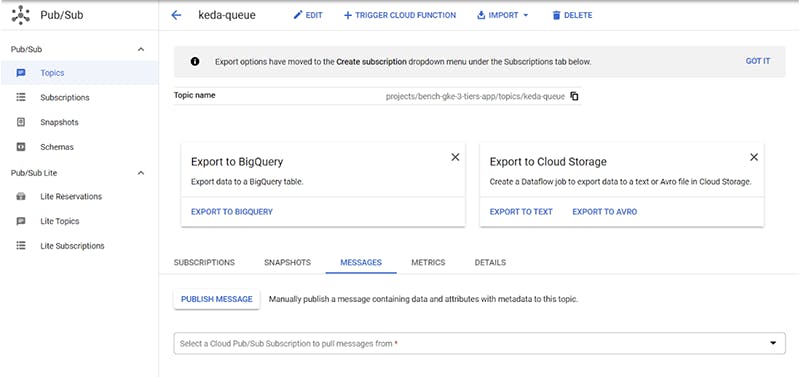
Now let’s publish some messages in our Pub/Sub queue in order to see KEDA in action:
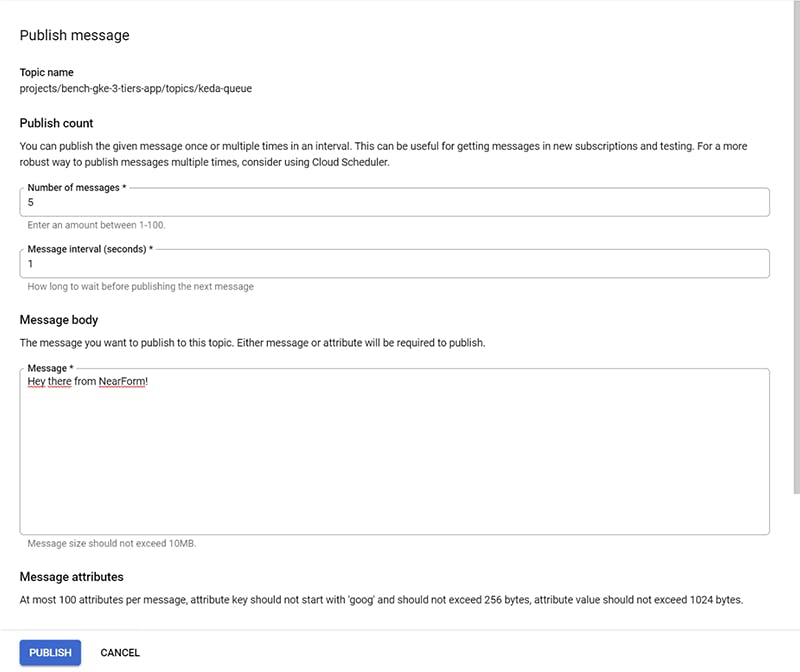
By clicking “PUBLISH” and waiting a few seconds, we should be able to see our deployment scaled to 5 replicas, as we defined in our file.
pedro_silva@cloudshell:                         $ kubectl get deployment --namespace keda-app
NAME      READY   UP-TO-DATE    AVAILABLE   AGE
keda-app  4/5     5             4           18d
Final Thoughts
In this article, we learned about KEDA and its concepts. We also saw it in action through scaling a sample NGINX application in our Kubernetes cluster.
I hope this content is meaningful to you and that you could learn more about KEDA from it.